Sunday, April 27, 2014

National Pretzel Day! April 26, 2014

Happy National Pretzel Day! 

Saturday, April 26, 2014 was National Pretzel Day, so I whipped up some yummy pretzels!

I mixed white and champagne FIMO (polymer clay) to make a light dough colour. Rolled out the clay and then shaped it into pretzels, then dusted yellow and brown chalk pastels to give them a baked effect. Starting with the lighter chalk colours first. Then I textured them to give them a more real look. Then baked them at the temperature according to the instructions on the package. I did NOT bake for 30 minutes as package instructs, but rather for only 10 minutes.


After they cooled I added white craft sand for the salt and sealed with glaze.

Voila, pretzels!


I hope you enjoyed this post. Stay tuned for more miniature posts! Happy Pretzel Day!

Please post a comment or email me at lisamlehr@gmail.com if you have any comments, ideas or mini-project requests!

Thursday, April 24, 2014

Happy National Pigs-in-a-Blanket Day! April 24, 2014

Happy National Pigs-in-a-Blanket Day! Say what? Sounds crazy, right? 

Let's celebrate anyways!
 

National Pigs-in-a-blanket Day is April 24th. So I am a little late for Korea, but for people back home I may be on time with this post! lol


To celebrate, I made some miniature pigs-in-a-blanket.


First, I made the wieners from FIMO clay. I mixed chocolate brown, red and a wee bit orange to get the colour I wanted. I rolled and cut them into the size I wanted and a little texture to the ends, then baked them. Once they cooled I wrapped them with (FIMO) crescent rolls.


For the crescent rolls, I mixed some white and champagne Fimo to get the colour I wanted. It helps to look at the real thing or pictures of the real thing.

Then I brushed on some colour with chalk pastels to give them a baked looked. Baked for five minutes. After they cooled I should have brushed on some glaze but will do that soon. I am thinking of adding some cheddar cheese to some of the pigs-in-a-blanket, then I will add the cheddar cheese!
 
If you would like a more detailed tutorial of making miniature pigs-in-a-blanket please let me know either by leaving a comment or sending me an email at lisamlehr@gmail.com
 
Please stay tuned for National Pretzel Day and How to Organize a Carafting Space or Room!
 
Happy miniaturing!


Monday, April 21, 2014

Happy Earth Day! April 22, 2014

Happy Earth Day Fellow Earthlings!

Today I thought I would honour Earth by sharing some ideas, tips and projects that are related to the 3 R's of the Earth!

Reduce, Reuse & Recycle!

As a miniature crafter (and global citizen), I always try to RE-duce the amount of waste I make, RE-suse as many materials as possible and to RE-cyle all my materials!  The great thing about miniature crafting is that the amount a materials is usually minimal and I usually RE-use the left over materials in future projects.

I also try to RE-duce my household waste by RE-using as many items as possible. For example, I tend to RE-use cardboard paper such as cereal boxes, and scrap paper. I use bottles or cans to hold tools like pens, pencils, paint brushes etc. I also use plastic see through packaging for windows or any projects that require it! Coffee grounds (let them dry really well) can be used for outdoor dirt scenes.  And anything that does make its way to the trash is recycled into plastics, paper etc..

So please reduce, reuse and recycle!

I thought I would share some pictures of recyclable ideas or projects that I made from RE-using RE-cycable items! Please note, I plan on doing a future post about printable projects, so I won't go into to too much detail about the actual printable projects, but instead focus more on the recyable aspects!

The following pictures of the miniature lap top computers, TV and other items were all made from recycled paper!


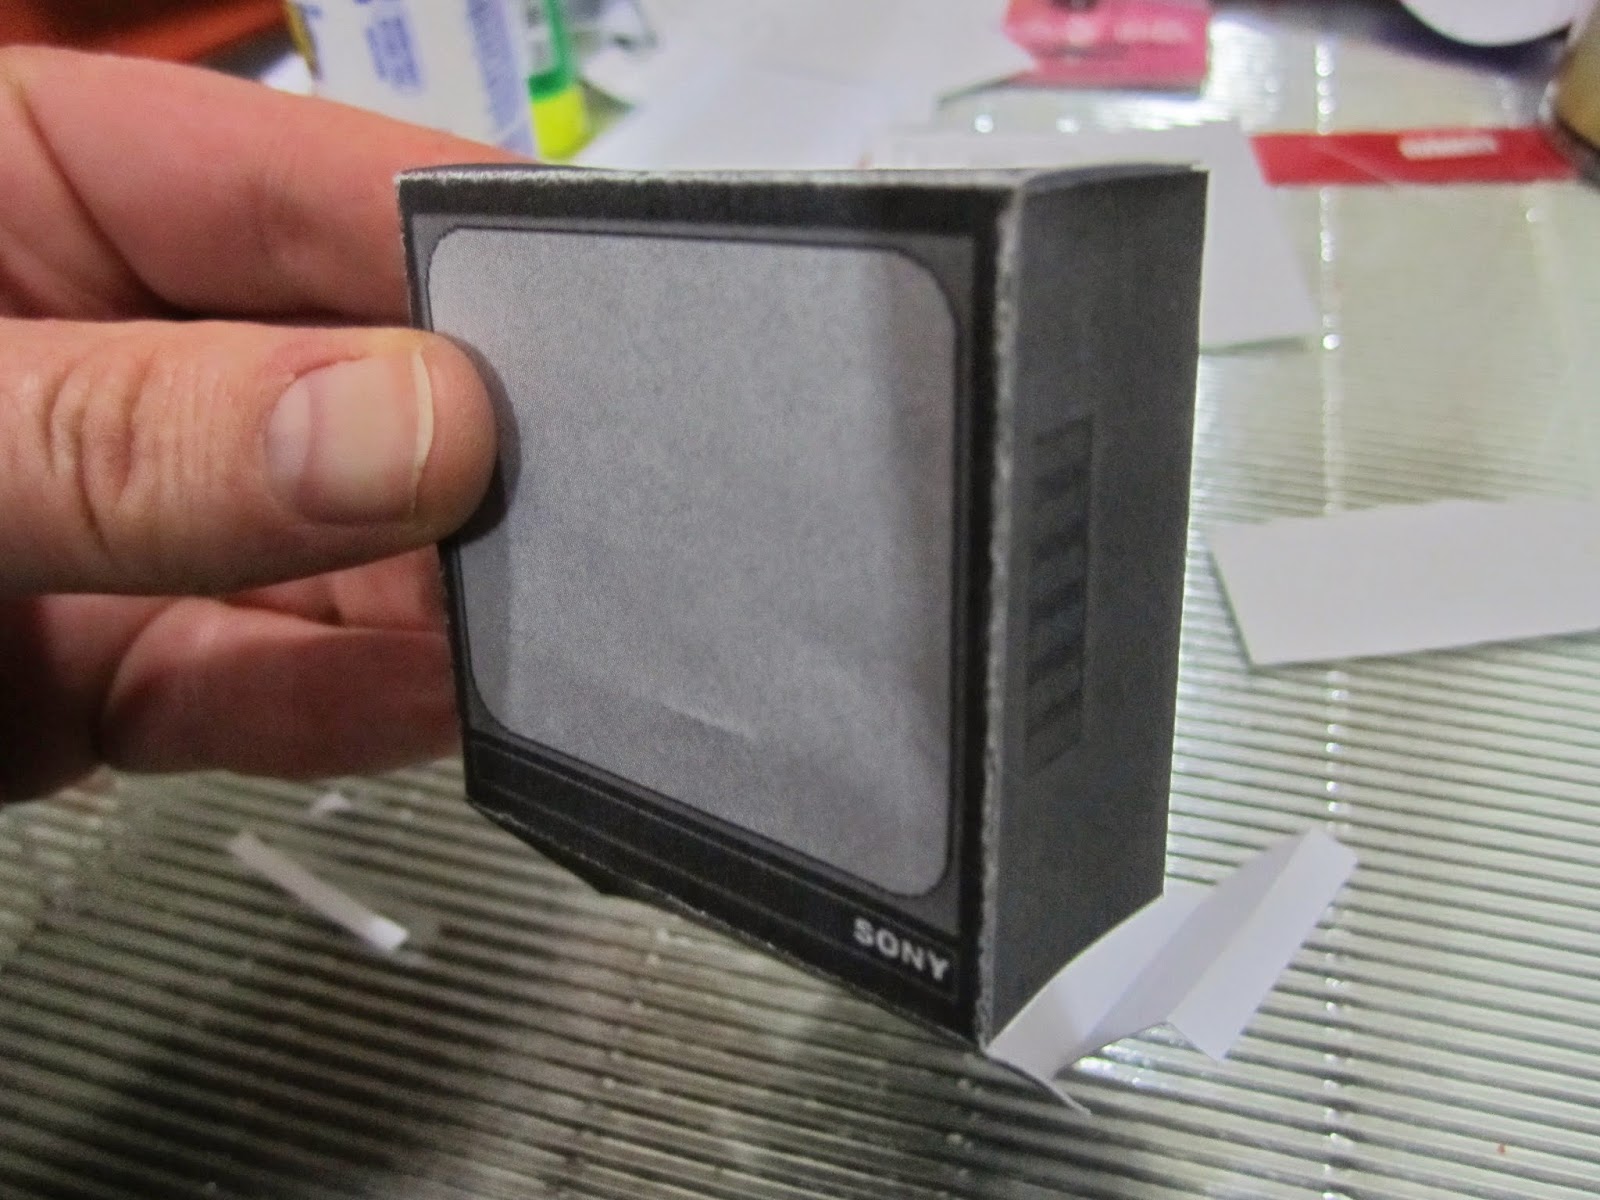
See these little scraps of paper by the TV, they too can be recycled or reused for other miniature projects!


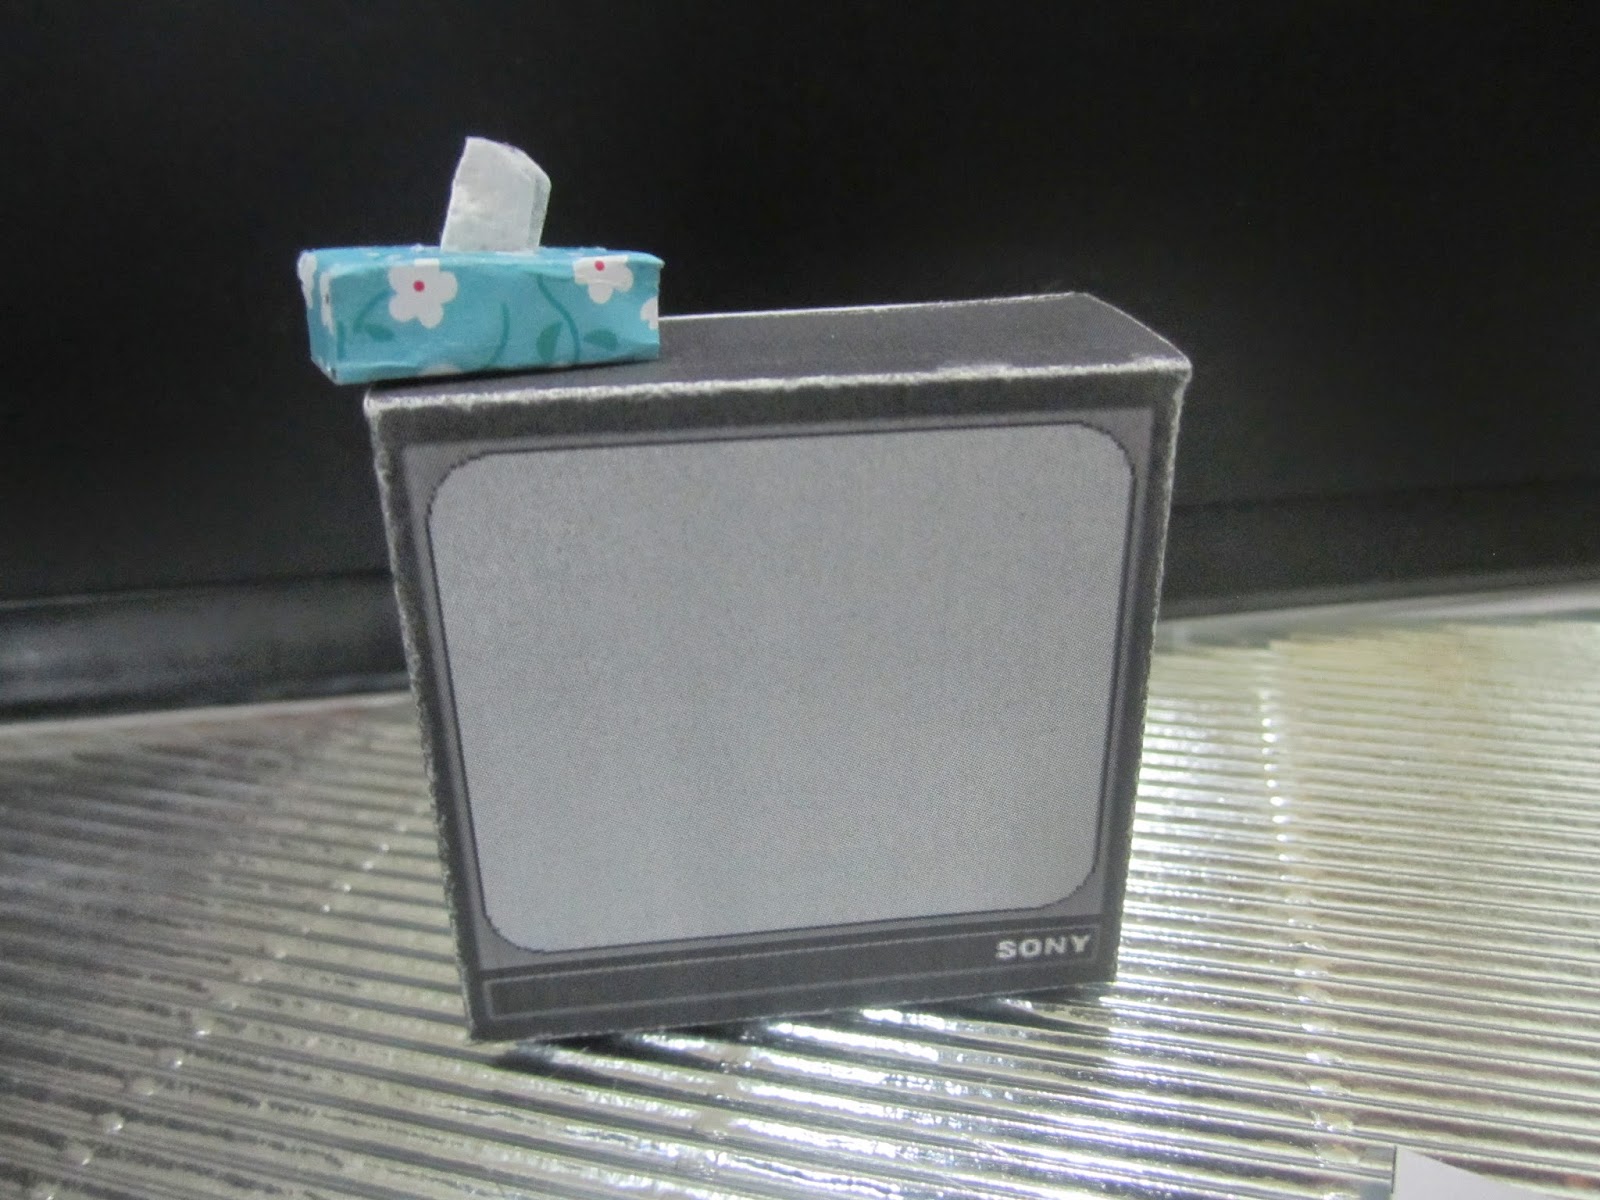
The tissue box sitting on top of the TV was made from scrap pieces of paper from a school class project!
Some of these boxes were made from scraps of paper from a school class project!

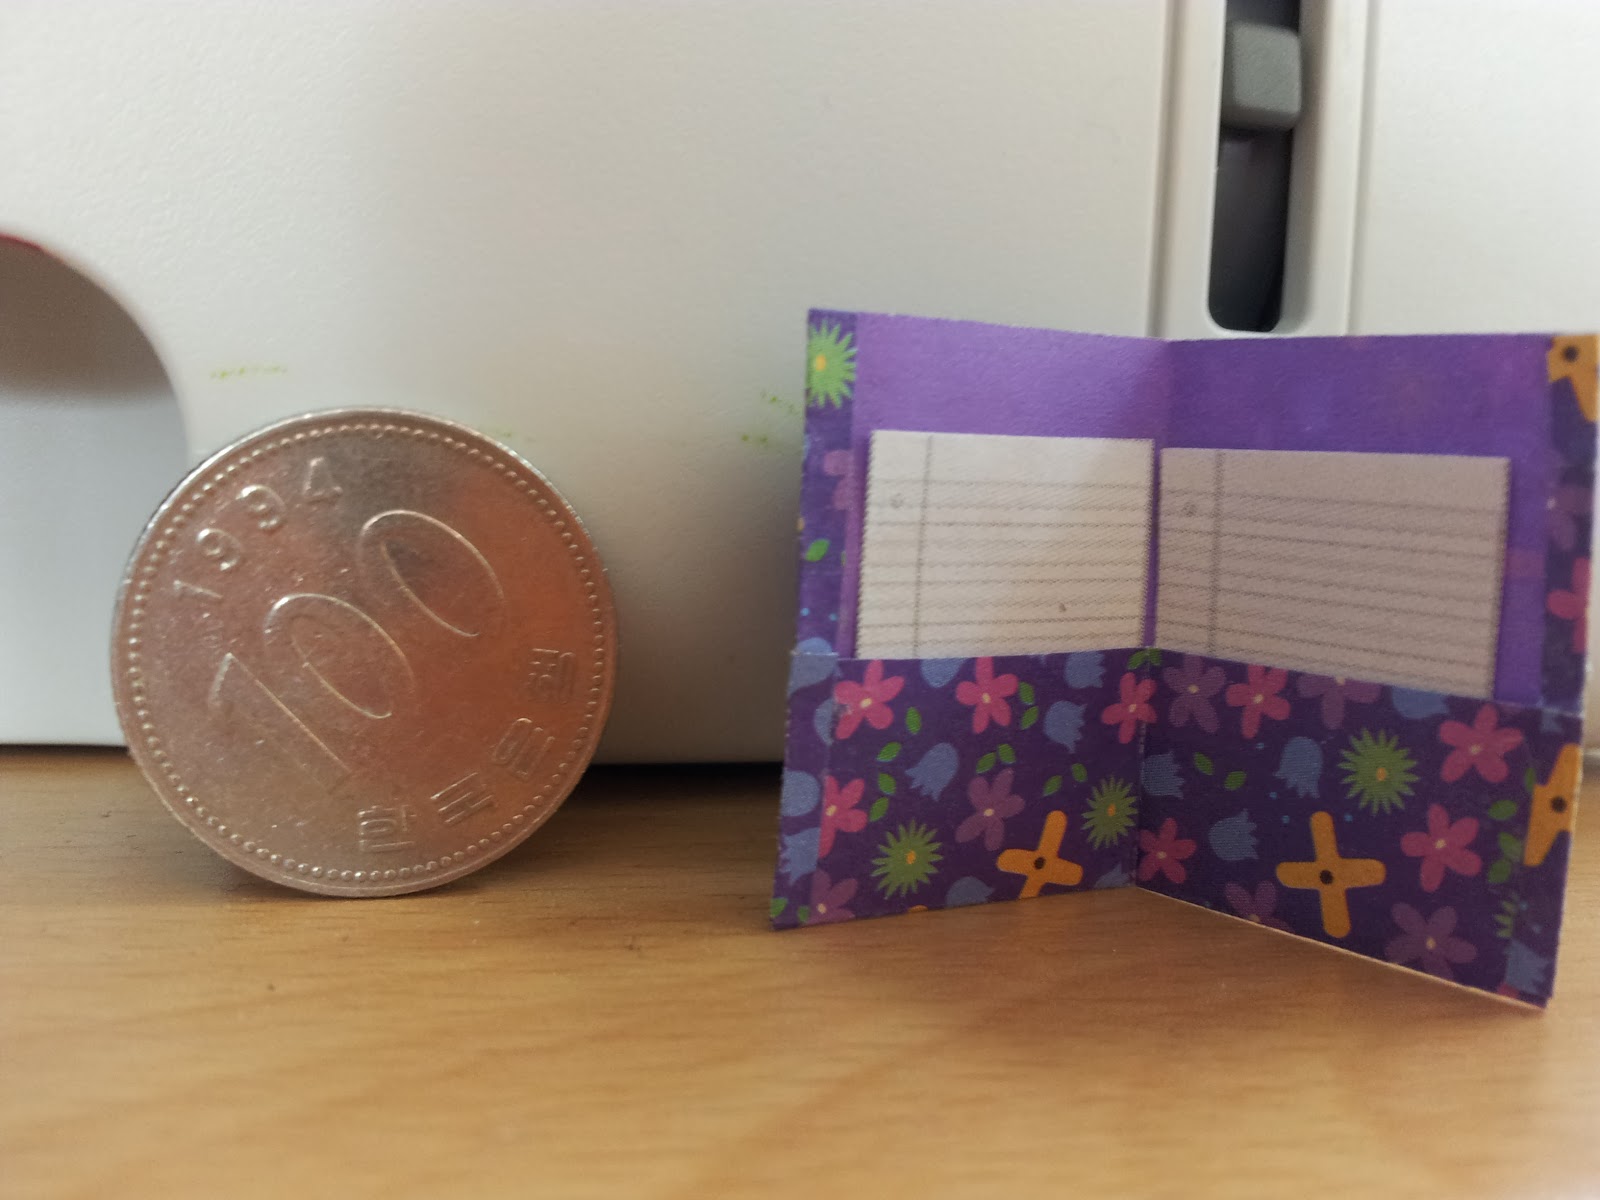
This notebook folder was made from scrap paper from a school class project!


The following pictures are popsicle sticks that are being used to make a wooden floor. I am currently working on a wine display where these flooring pieces will go. More about that later :)
As you can see, I used a pizza box to hold the popsicle sticks as I was working. This eliminated using any paper towels and there was not much to clean up. The other great thing is that this pizza box has been used over and over!


Miniaturists...don't throw away any household items! Find a use for them. In this case, I had some picture frames that I had aquired but didn't need. I decided to RE-use them to make a display stand for a Korean food stand display that I am going to make soon. If timing goes well, I should have some stands made by next month! So far I have made ddeokboki! Please stay tuned for that one!

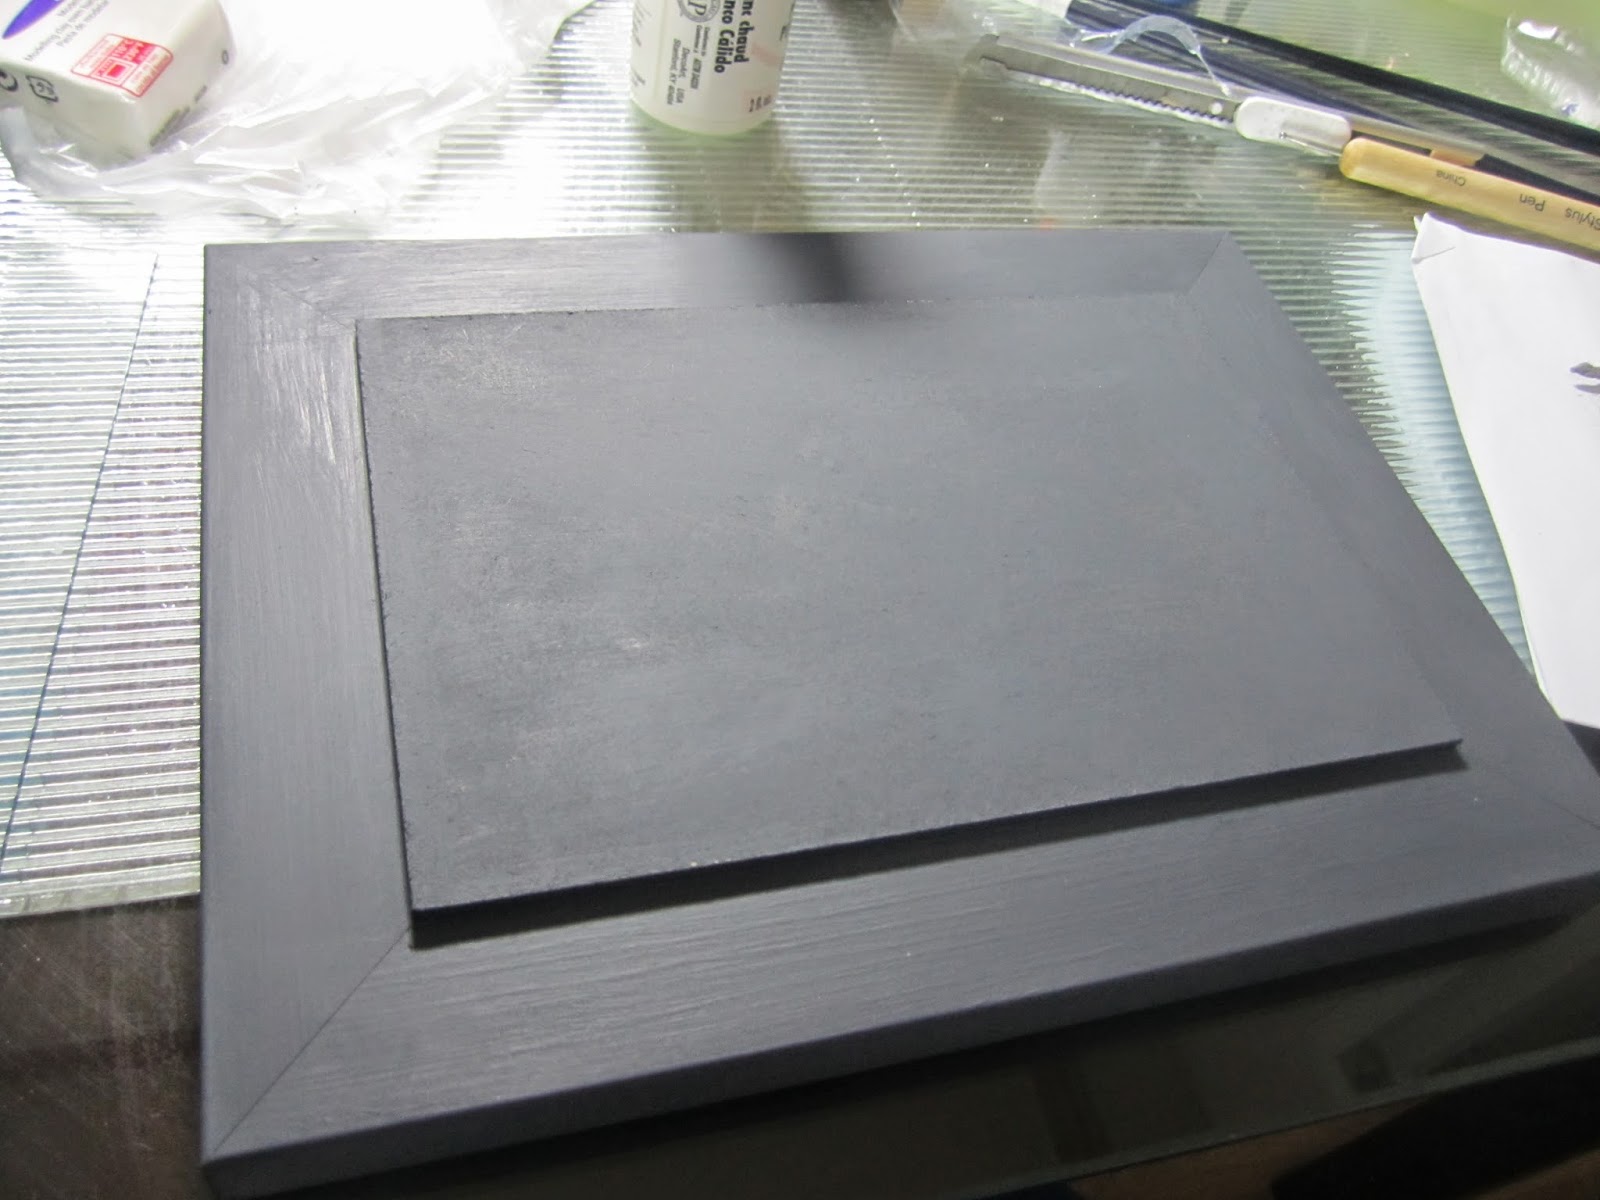
Picture frame RE-purposed!
Fellow miniaturists and crafters, please reduce, reuse and recycle!

Please leave your recycling and reusing ideas in the comments! Would love to hear from you!

Sunday, April 20, 2014

Happy Easter!


A Big Mini-Happy Easter!

I hope everyone is having a wonderful Easter weekend!

To celebrate Easter I decided to make some very quick mini-Easter baskets with chocolate bunnies.


I had already made the chocolate Easter bunnies from polymer clay using some molds, and I just made these two baskets this weekend! I got the idea of making my own weaved baskets after watching a YouTube video by MsMiniLover, because I didn't have any baskets of my own here in Korea. This is the first time I have ever done any type of weaving project.
 
The chocolate bunnies were made from Kato clay and I used molds that I had purchased from a lady in the States. Today, I painted on some details (eyes, ears and flowers) using a toothpick and then glazed with Triple Thick to not only give it a shine, but to protect it from wear and tear.
 
 
The weaved baskets were made from index card paper and then painted. Here is a photo of the circle one. Although it was fairly straightforward and somewhat easy, it did require lots of patience! I did make a few mistakes on the weaving, but let's hope you don't notice!


As you can see in the photo above and below, I also put some folded thin strips of paper in the green basket. For the pink basket, I just put in a cotton ball.


Here are some more pictures of the Easter goodies.  

The coin shown in this picture is a Korean 100 won piece, which is comparable in size to a Canadian or American quarter.

The painted details on these bunnies' ears were done before I decided to change them to a darker pink.

This Easter bunny is a bit too big for this basket and was only put in for display purposes. I would normally make some type of packaging such as a box with a clear plastic window like the ones you would buy in a store. 
Mmmm chocolate!
 I hope everyone has had a nice Easter weekend with family and friends. If you have any questions, suggestions or requests for a particular project please let me know in the comments!

Take care and stay tuned for future mini posts! 

Thursday, April 17, 2014

Picture Post: Follow Up to My Last Post


I don't have many pictures of my dollhouses and other work here with me in Korea, but I do have some pictures of my lighthouse to share.

So this is what the lighthouse should look like when it's finished. Please note,  I do not have the little house that is in this picture.

 
Dollhouse Company's Photo


 Here is a back view of what the lighthouse will look like when finished. I intend to decorate mine as a Maritime Museum.
Dollhouse Company's Photo

I was so excited when the dollhouse arrived, so here it is just out of the box! You can catch a glimpse of one of my dollhouses in the upper left hand corner of the picture.
Just out of the packaging!

Getting started! After making sure that all parts were in the box I started with painting all the pieces. After the lighthouse is put together I will make it look weathered and I am hoping to do some landscaping.


It's now starting to come together!


The following picture is the front side of the lighthouse. If you look at the left hand side of the photo you can see a partial view of the second dollhouse that I found at a garage sale!


So as you can see I use my dining room as a work area! If you have any questions about the lighthouse or any other questions about miniatures please let me know. Also please feel free to comment.
 
Take care and have a wonderful Easter!

Why Miniatures?


Hello Dear Miniaturists,

It’s been a while since my last post.

Last time I talked about miniature scales, so I thought this time I would tell you how and why I got into this hobby.

          I was living in the Halifax area the year I graduated from high school. While shopping in Halifax one day I stumbled upon a dollhouse miniature shop. I was in total awe of the dollhouses, furniture and everything else mini.

I decided to save my money to buy a dollhouse, but just before I graduated from high school I found out that I was moving to Germany, so I decided to hold off on buying a dollhouse because it would have to go into storage for the duration of my stay in Germany because I was limited on how much stuff I could take with me.

One day while on a 10km volksmarch (organized walks), I walked past a miniature Schwartzwald (German) style house in someone’s yard. I was like, OMG! So my friend (who is also interested in minis) and I went back to the house and discovered that the man who lived there built the miniature house. We asked him if he would build a house for each of us, and he said yes!

My friend and I also found a German company, Bodo Hennig, which sells miniature furniture, however, the scale was not 1/12th, but it seemed to fit our dollhouses quite well.

Since moving back to Canada, I have rescued 2, 1/12th scale dollhouses from yard sales that had some wear and tear, but salvageable. I was elated to find out that these houses were worth hundreds of dollars. I have also purchased a miniature lighthouse which is almost finished. My dollhouses and lighthouse will have to wait until I move back to Canada, for me to complete them.

Because I live in Korea I am limited to smaller projects such as room boxes, display cases and miniature foods. I currently have some projects under works, so I will keep you posted.

Stay tuned!