Tuesday, September 30, 2014

Cute Miniature Finds in Gwangju!

While shopping downtown Gwangju, South Korea a couple of weeks ago, I stumbled across a really cute new store named, 별헤는 항구석, which means, in a corner of a room counting stars (as in gazing at the stars). Because of the literal translation, it makes it a little difficult to give an exact translated name. So I will call it Star Gazing from the Room! Nonetheless it is a cute little store!

 It was so cute I just had to go in!

I came across some really cute miniature items; laptop computers and soft drink products.


These laptop computers will add a finishing touch to any dollhouse or room box display.

Of course what dollhouse or miniature scene would be complete without a soft drink!


Coke on ice!
 
For store information please see business card below.
blog.naver.com/staroom1124


Also, sorry it's been awhile since my last post, but I was on my summer vacation and  have been very busy getting ready for my move back to Canada. I will have a post soon regarding miniatures while on vacation. I met a wonderful fellow miniaturist and had a fantastic time working with minis, so stay tuned!
 
Although I will miss Korea immensely, I am excited to get home for mini reasons! I have some things in store plus I will be doing more blog posts! Lot's of projects!
 
Stay tuned!

Thursday, May 15, 2014

National Chocolate Chip Cookie Day!

Happy National Chocolate Chip Cookie Day! May 15th
 

May 15th is National Chocolate Chip Day, so to celebrate I decided to bake some chocolate chip cookies!

First, I made the chocolate chips by rolling out some chocolate coloured Fimo clay and then baked it according to the instructions on the package. After it was baked I cut the clay into very thin strips and then sliced into very small chocolate chunks.


Then I mixed and conditioned white and champagne coloured Fimo clay for the basic cookie colour.

Next I added the baked chocolate chips to the white and champagne coloured clay, measured out into small pieces, pressed flat, textured and then added coloured pastels to give them a more realistic baked look. Then baked.

Of course cookies are not complete without milk! For the cup, I used a cap from a mechanical pencil. I added white paint to make it look like a cup of milk!

Voila, cookies and milk!

Upcoming Mini Things!

I have some mini projects that I have been working on, but are not quite ready yet. Some things to look for in future posts: nacho chips with salsa sauce, tacos and some different types of bread and or sandwiches on cutting boards. Here are a couple of pictures of projects in the works!
Nacho chips and some tacos! Taco time!
Cutting boards I made with strips of wood. Bread and or sandwiches to follow!

Stay tuned :)
 
Please leave a comment if you have any questions or comments. Thank you!

Monday, May 5, 2014

Happy National Orange Juice Day!


Happy National Orange Juice Day!


National Orange Juice Day was May 4th. To celebrate I made some orange slices and orange juice.


Orange Slices

To make the orange slices I used 4 colours of Kato clay: Orange, transparent, white and beige.
First I mixed orange with a very small amount of white to make a slightly lighter orange colour. This colour is for the outside and the inside. For the inside I also mixed it with a lot of Kato transparent. Once the inside colour was mixed, I shaped it into a cylinder shape. I cut it in half 4 times to add the white mixture in between the halves. Then I pressed firmly on the outside of the cylinder from the middle outwards to work out any air bubbles that may have formed.
The white mixture was made by adding an extremely small amount of beige to give it a less bright white colour.
After I added the white mixture between all 4 halves and worked out air bubbles, I added a thin white strip to the outside.
Then I added the orange (without the transparent) to the outside.
Again I started to press firmly to the outside working my way from the center to the outsides. After I pressed and stretched I then started to roll it out to a thickness that would be suited to 1/12th scale.
Once they were rolled out to the size I wanted, I then sliced them and added texture with a needle tool to make them more realistic. I baked them on the lowest temperature according to the baking instructions. The transparent bakes at a lower temperature.


Orange Juice
To make the orange juice I used Mod Podge Dimensional Magic made by Plaid, plastic caps from mechanical pencils (cups), and some orange and yellow chalk pastels.  A big thank you to my friend, Peter, for getting the Dimensional Magic from Canada for me!
 
I mixed the dimensional magic with mostly orange chalk pastel and a wee bit of yellow. Then used a toothpick to add the mixture into the cups. After seeing the finished product, I feel that the orange juice is a little too orange, but for now I will think of it as Tang. 
 
For an added touch I put orange slices on the cups!
 
Voila...orange juice!


Please comment if you liked my orange juice or if you have any ideas, thoughts or suggestions!

Please stay tuned for future miniature posts. Take care :)


Thursday, May 1, 2014

Book Review & May's Happy National WHAT Month?

Hello Dear Miniaturists :)

First I was just going to post about National What Month? (more about that later!), but stop the presses! I'm really excited because I just received two new books in the mail about miniatures. One is about miniature displays and the other is about making miniature foods.
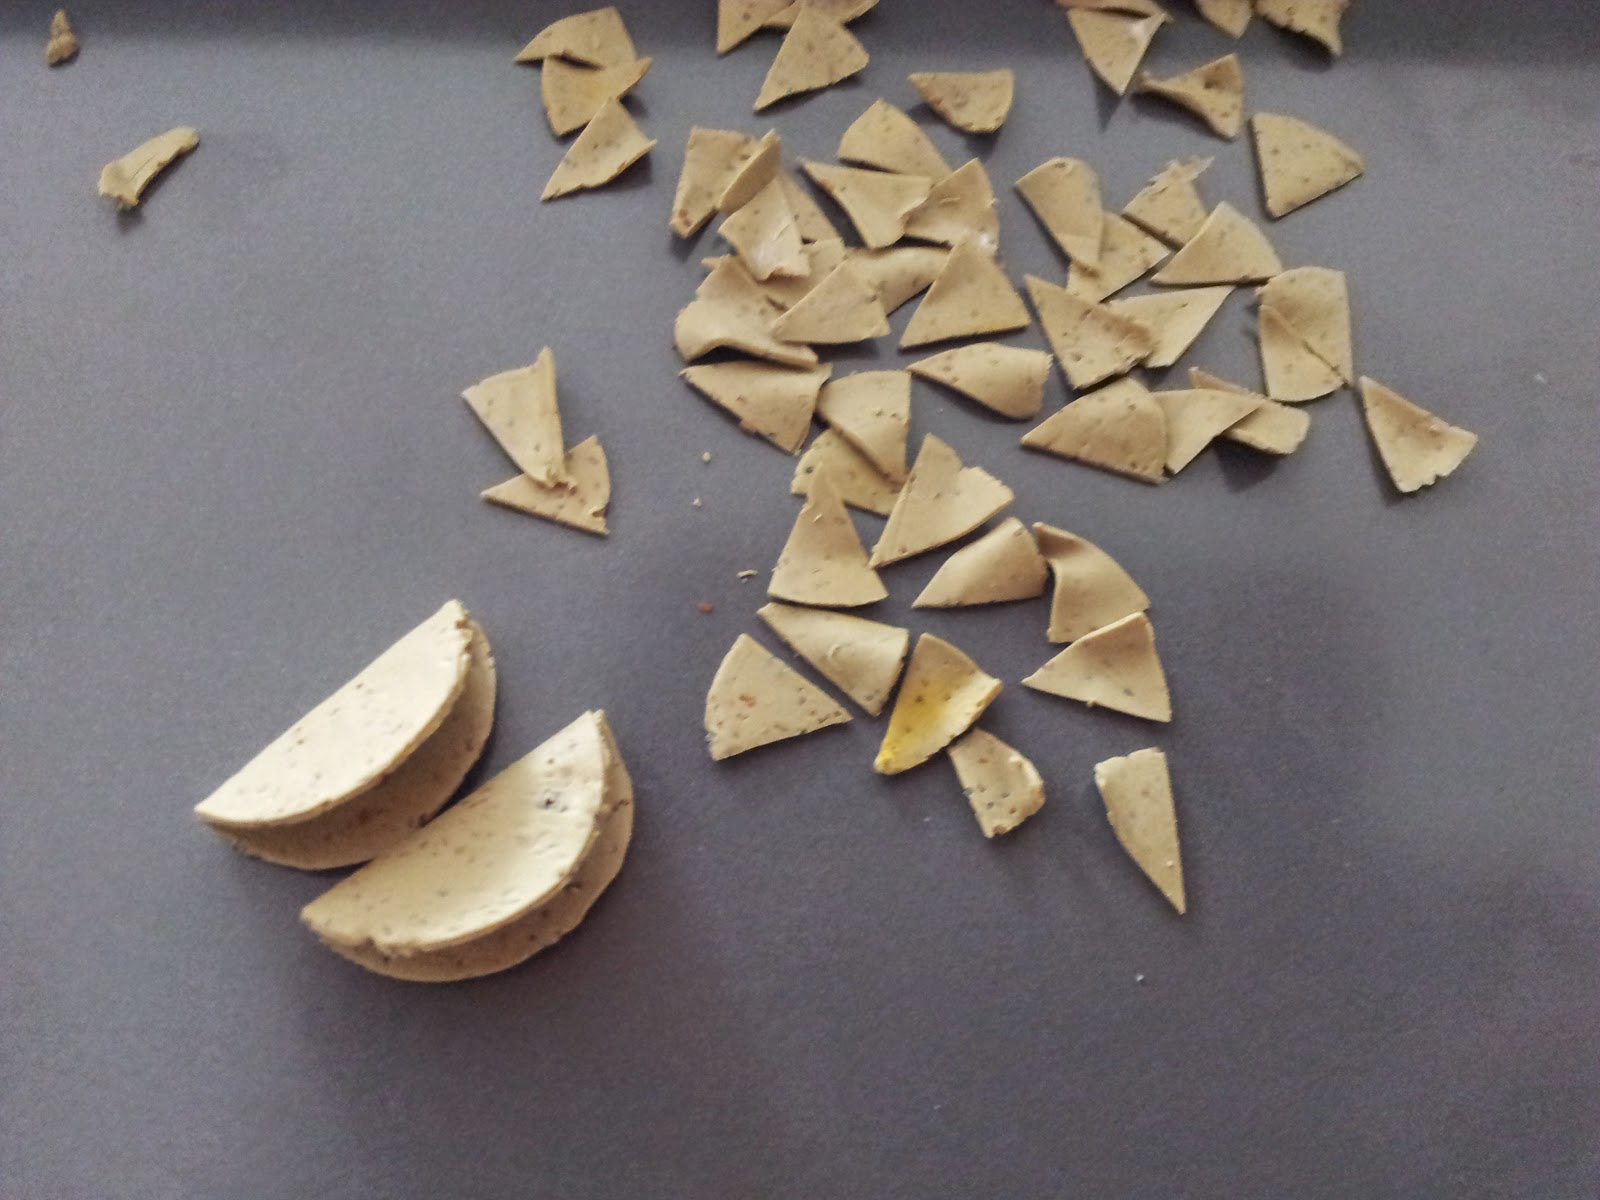
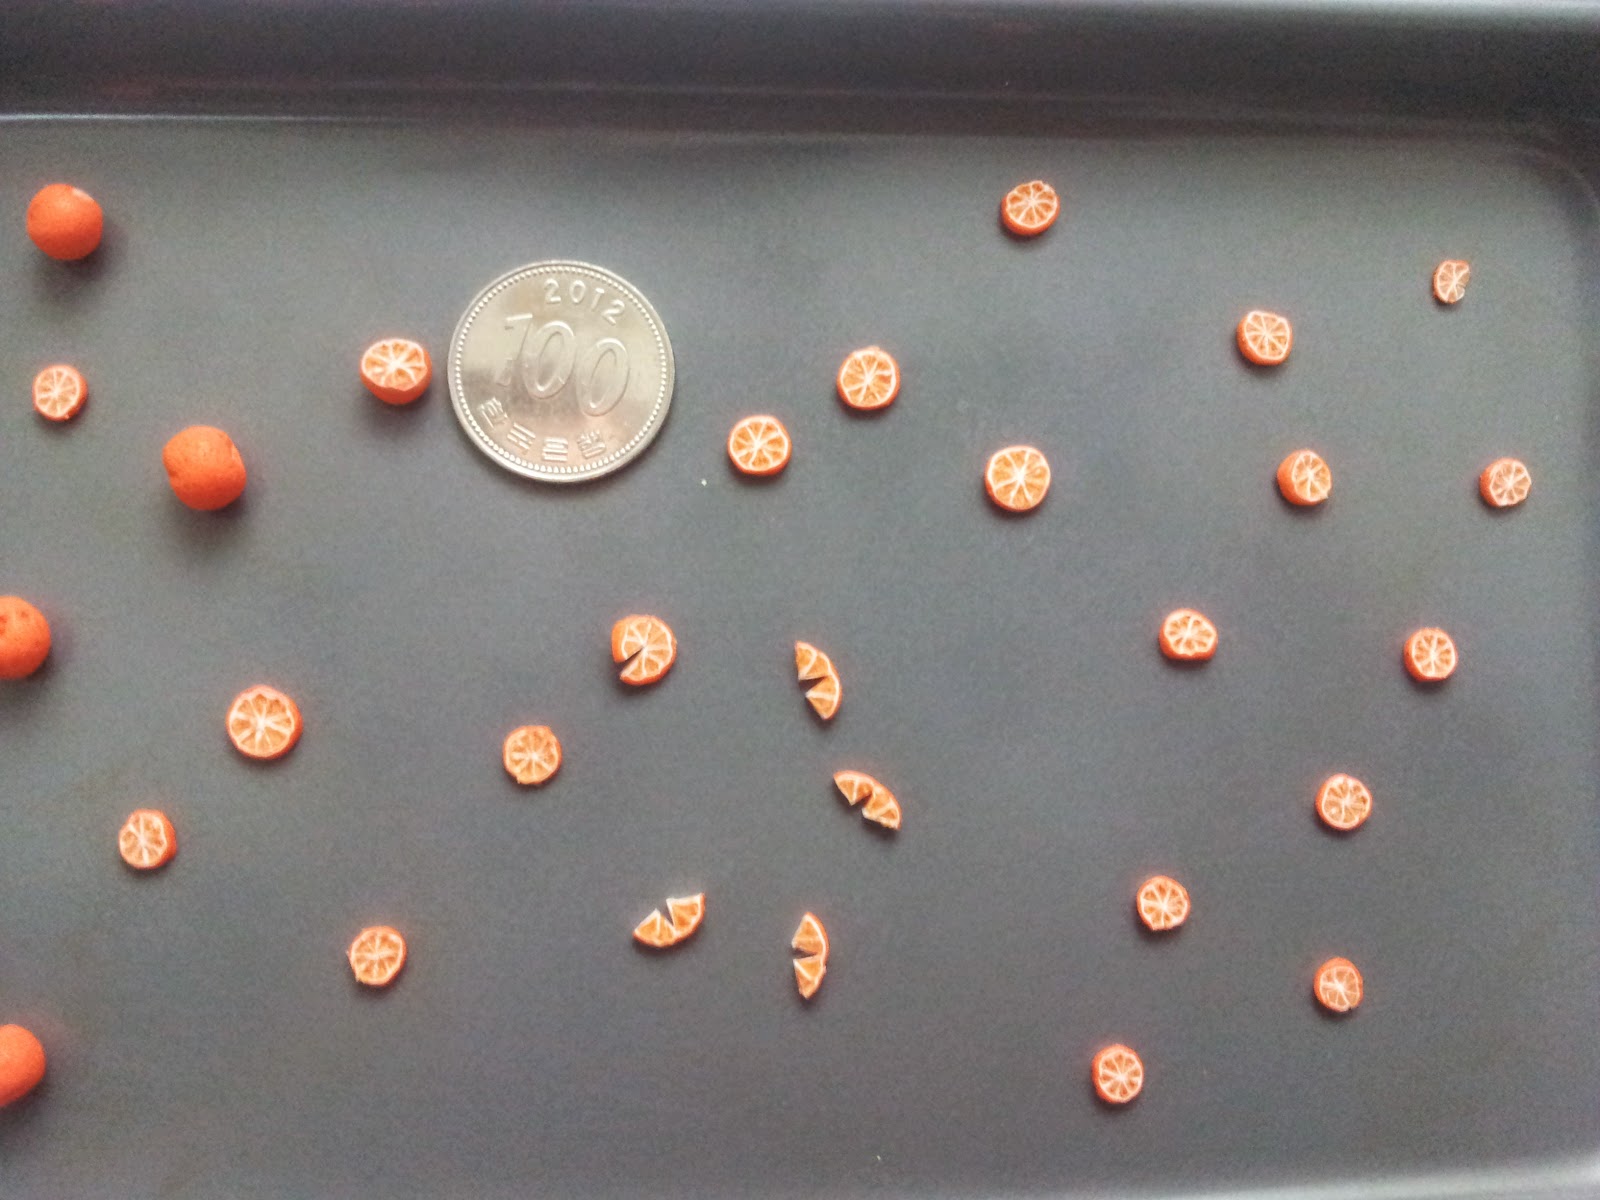
I decided to showcase just one in this post, which is going to be about making miniature foods, mainly because I've been on a food kick lately.

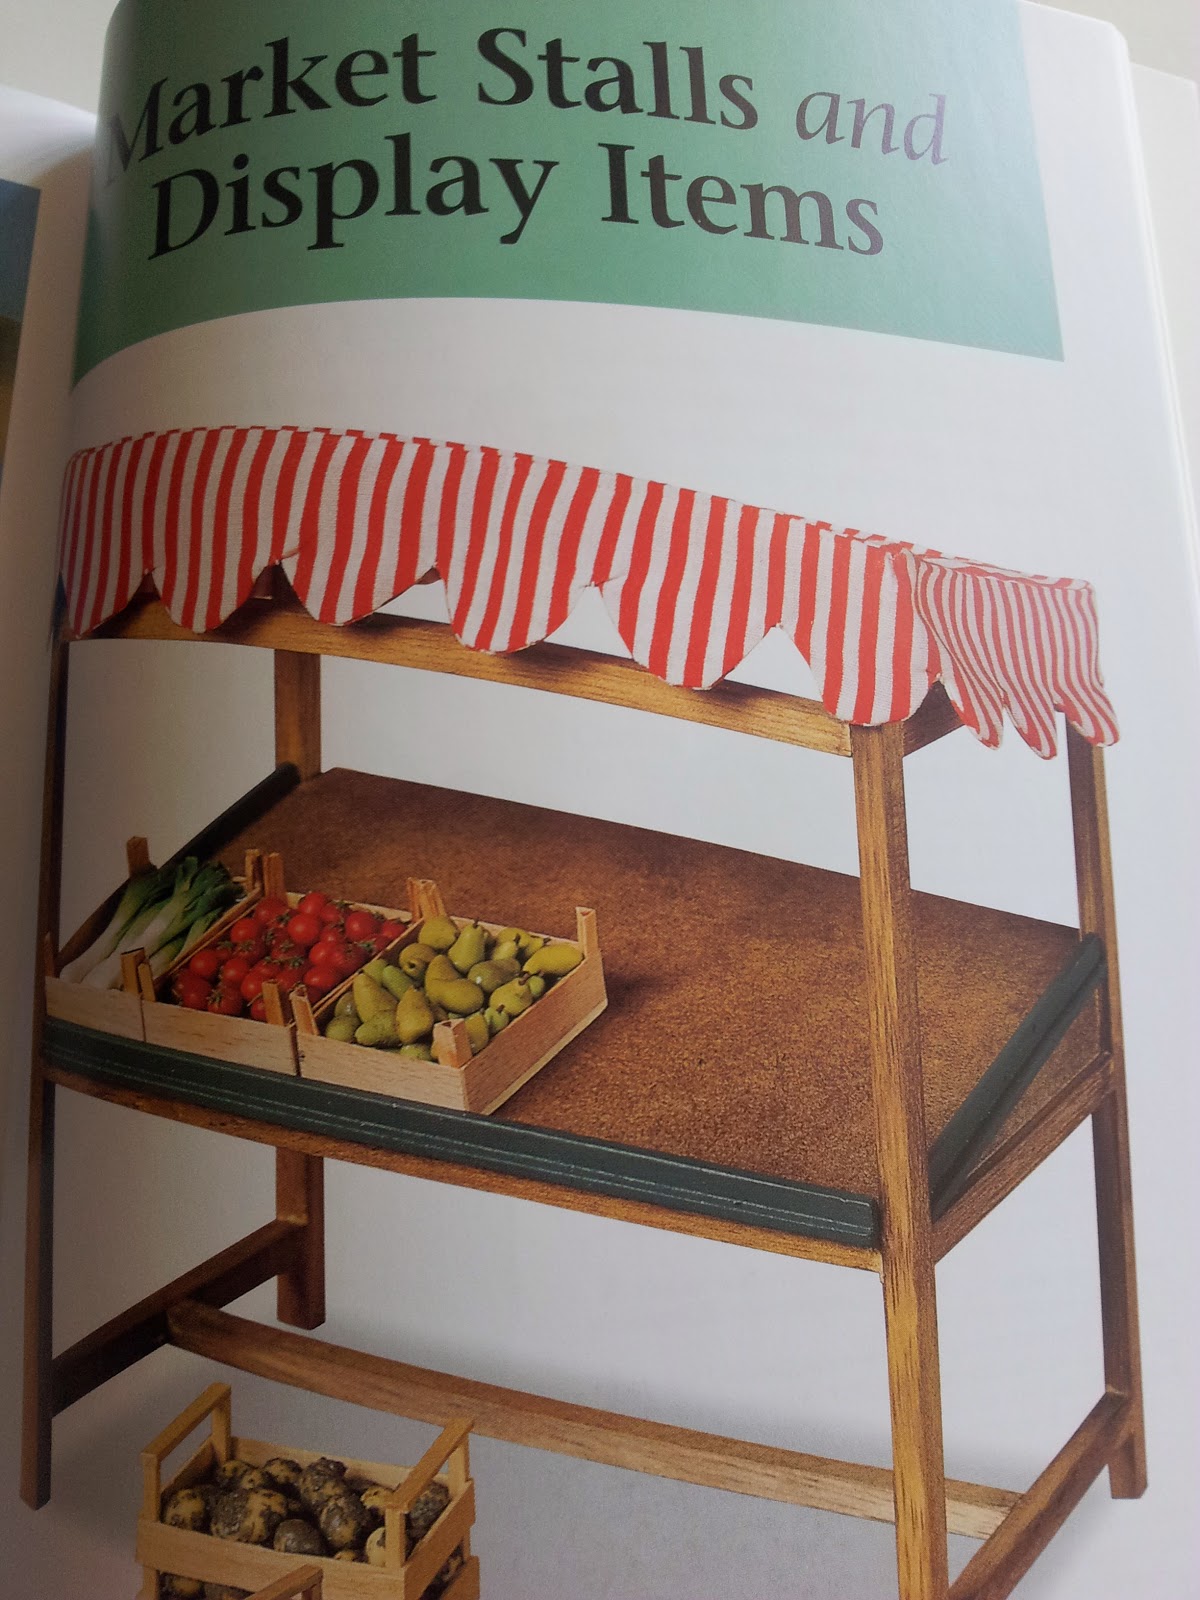
Making Miniature Food and Market Stalls, by Angie Scarr.

The author and artist Angie Scarr, I discovered, also has a YouTube channel with videos explaining and demonstrating some of the foods she has listed in her book.
Although I haven't tried making any of the miniature food yet (just received the book in the mail!), I thought I would share some things I've noticed just by glancing through it.
 
This book is mainly about making miniature foods with polymer clay. It starts with an informative introduction about polymer clay, clay tools, mixing clay colours and safety tips. This is especially beneficial for beginners.
 
After the introduction, the book is divided into five main parts. The first four parts being classified into different food typess and the fifth part (what I consider to be an added bonus) is how to make a food stall, some tablewear and food crates.
 
Food stalls include a bakery and deli, a meat, a fruit and vegetable and a fish stand.


The author and artist, Angie Scarr, explains that the food is listed from easiest to less easier. So after I get started I will let you know!
 
Each food item has a materials list, a colour mixing guide and the artist's method to create each food item. Also each step is numbered with a corresponding individual numbered picture, which makes it seem easier to follow along.
 
I plan to put this book to the test and create some miniature foods. I will keep you posted!
 
 
May is National WHAT Month?
The month of May has some delicious national food celebrations, not to mention some interesting food days! Let's not forget about Mother's Day! It's not a food holiday, but certainly worth mentioning!
 
To celebrate these national month and day foods, I plan to create them, or some version of them, in miniature.
 
The following are some interesting monthy foods:
- National Barbeque Month
- National Egg Month
- National Strawberry Month
- National Hamburger Month
- National Salad Month
- National Salsa Month.
 
There are also some special food days coming up, which I will definetly be sharing with you :)  Can you say wine, cheese and chocolate?
 
Please stay tuned for future miniature posts and have a great weekend!

Sunday, April 27, 2014

National Pretzel Day! April 26, 2014

Happy National Pretzel Day! 

Saturday, April 26, 2014 was National Pretzel Day, so I whipped up some yummy pretzels!

I mixed white and champagne FIMO (polymer clay) to make a light dough colour. Rolled out the clay and then shaped it into pretzels, then dusted yellow and brown chalk pastels to give them a baked effect. Starting with the lighter chalk colours first. Then I textured them to give them a more real look. Then baked them at the temperature according to the instructions on the package. I did NOT bake for 30 minutes as package instructs, but rather for only 10 minutes.


After they cooled I added white craft sand for the salt and sealed with glaze.

Voila, pretzels!


I hope you enjoyed this post. Stay tuned for more miniature posts! Happy Pretzel Day!

Please post a comment or email me at lisamlehr@gmail.com if you have any comments, ideas or mini-project requests!

Thursday, April 24, 2014

Happy National Pigs-in-a-Blanket Day! April 24, 2014

Happy National Pigs-in-a-Blanket Day! Say what? Sounds crazy, right? 

Let's celebrate anyways!
 

National Pigs-in-a-blanket Day is April 24th. So I am a little late for Korea, but for people back home I may be on time with this post! lol


To celebrate, I made some miniature pigs-in-a-blanket.


First, I made the wieners from FIMO clay. I mixed chocolate brown, red and a wee bit orange to get the colour I wanted. I rolled and cut them into the size I wanted and a little texture to the ends, then baked them. Once they cooled I wrapped them with (FIMO) crescent rolls.


For the crescent rolls, I mixed some white and champagne Fimo to get the colour I wanted. It helps to look at the real thing or pictures of the real thing.

Then I brushed on some colour with chalk pastels to give them a baked looked. Baked for five minutes. After they cooled I should have brushed on some glaze but will do that soon. I am thinking of adding some cheddar cheese to some of the pigs-in-a-blanket, then I will add the cheddar cheese!
 
If you would like a more detailed tutorial of making miniature pigs-in-a-blanket please let me know either by leaving a comment or sending me an email at lisamlehr@gmail.com
 
Please stay tuned for National Pretzel Day and How to Organize a Carafting Space or Room!
 
Happy miniaturing!


Monday, April 21, 2014

Happy Earth Day! April 22, 2014

Happy Earth Day Fellow Earthlings!

Today I thought I would honour Earth by sharing some ideas, tips and projects that are related to the 3 R's of the Earth!

Reduce, Reuse & Recycle!

As a miniature crafter (and global citizen), I always try to RE-duce the amount of waste I make, RE-suse as many materials as possible and to RE-cyle all my materials!  The great thing about miniature crafting is that the amount a materials is usually minimal and I usually RE-use the left over materials in future projects.

I also try to RE-duce my household waste by RE-using as many items as possible. For example, I tend to RE-use cardboard paper such as cereal boxes, and scrap paper. I use bottles or cans to hold tools like pens, pencils, paint brushes etc. I also use plastic see through packaging for windows or any projects that require it! Coffee grounds (let them dry really well) can be used for outdoor dirt scenes.  And anything that does make its way to the trash is recycled into plastics, paper etc..

So please reduce, reuse and recycle!

I thought I would share some pictures of recyclable ideas or projects that I made from RE-using RE-cycable items! Please note, I plan on doing a future post about printable projects, so I won't go into to too much detail about the actual printable projects, but instead focus more on the recyable aspects!

The following pictures of the miniature lap top computers, TV and other items were all made from recycled paper!


See these little scraps of paper by the TV, they too can be recycled or reused for other miniature projects!


The tissue box sitting on top of the TV was made from scrap pieces of paper from a school class project!
Some of these boxes were made from scraps of paper from a school class project!

This notebook folder was made from scrap paper from a school class project!


The following pictures are popsicle sticks that are being used to make a wooden floor. I am currently working on a wine display where these flooring pieces will go. More about that later :)
As you can see, I used a pizza box to hold the popsicle sticks as I was working. This eliminated using any paper towels and there was not much to clean up. The other great thing is that this pizza box has been used over and over!


Miniaturists...don't throw away any household items! Find a use for them. In this case, I had some picture frames that I had aquired but didn't need. I decided to RE-use them to make a display stand for a Korean food stand display that I am going to make soon. If timing goes well, I should have some stands made by next month! So far I have made ddeokboki! Please stay tuned for that one!

Picture frame RE-purposed!
Fellow miniaturists and crafters, please reduce, reuse and recycle!

Please leave your recycling and reusing ideas in the comments! Would love to hear from you!